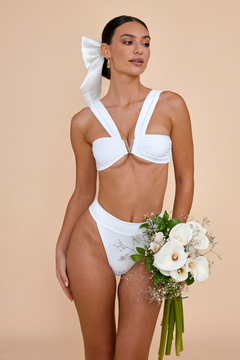
There’s so many ways to tie a triangle bikini top, which is why we’re such fans of the classic style. From simple halters to graphic lines and upside down aesthetics, here’s 11 of our favourite different ways to tie a bikini top.
1. Classic Halter
Let’s start with the basics: how to tie a halter bikini top. A classic halter bikini is super flattering on all figures, and takes just two simple knots to complete. Simply bring the top straps around to the nape of your neck and tie off so it’s comfortable, yet secure. Repeat the same with the two back straps, tying off in a bow for a classic look.
2. Cross Front
A step up from the standard halter – this is exactly how to tie a criss cross bikini top without getting complicated. First, cross the two top straps over at your decolletage before tying off as you would normally at the nape to create a chic cross-front look.
3. T-Back
Start with your classic halter configuration, but instead of tying off the lower straps with a bow, do a quick single knot before connecting them back up with the straps at the nape of your neck. The result? A simple yet sporty look we love.
4. V-Shaped Back
Similar to the T-back, but instead of tying everything off at the nape, you bring the two lower straps back over your shoulders, and knot them at the cup apex to create angular lines through your look.
5. Twist Keyhole Front
The cross-front, but make it fancy. Start by crossing the neckline straps at the front, but twist them around themselves a few times before continuing on to the knot at the nape.
6. Choker Collar
Start with the classic halter configuration, but wrap one top strap (comfortably!) around your neck and knot it once it reaches back around to the nape to create a subtle choker effect.
7. Asymmetric Shoulder
The one-shoulder look is a favourite this season, but you can create the effect with any triangle bikini top you already own. Cross one neckline strap across the front of your decolletage and do a single knot at the shoulder, before looping it around to create a choker configuration to keep the asymmetric strap in place.
8. Front V
Create a cage-style look by looping the top straps around your neckline, before bringing them back down and knotting them at the front between the two cups.
9. Upside Down Halter
The upside down bikini is an IT-girl essential, and it’s a super simple look to recreate. Invert the cups so the base becomes the inside neckline, then tie as you would a regular halter for instant lift and shape.
10. Triangle to Bandeau
Ever wondered how to tie a triangle bikini top into a bandeau? Let’s go. Position the cups so each base is facing inwards at your bust, with the cup apexes now forming the sides. Create a knot at the centre of your bust, before tying into a halter at the nape. Tie off the remaining straps behind your back, and you’ve just converted your triangle bikini into a bandeau bikini.
11. Strapless Bandeau
This is #10, without the tan lines. After creating the knot at the centre of your bust, simply wrap those straps around to your back (going underneath your arms, not over your shoulders). Knot both sets of straps at the back and you’ve got an instant strapless bandeau top.
With so many different ways to tie a triangle bikini, it’s safe to say this is one bikini top that can work with every personal style. All that’s left to do? Find your favourite colour or print and let your creativity take the lead. Shop our latest collection of bikini tops and get ready to start tying.
